Setting up & Assigning a test
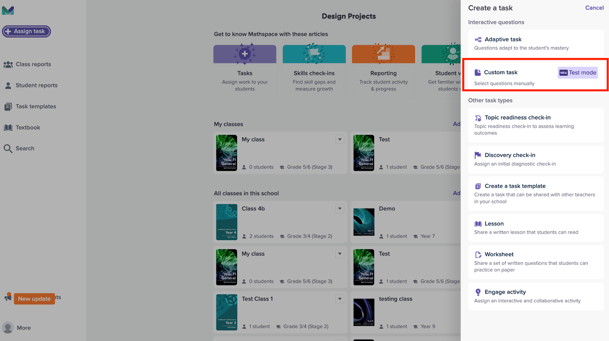
Step 1: Start a Custom Task
Begin by launching the Custom Task assignment flow.
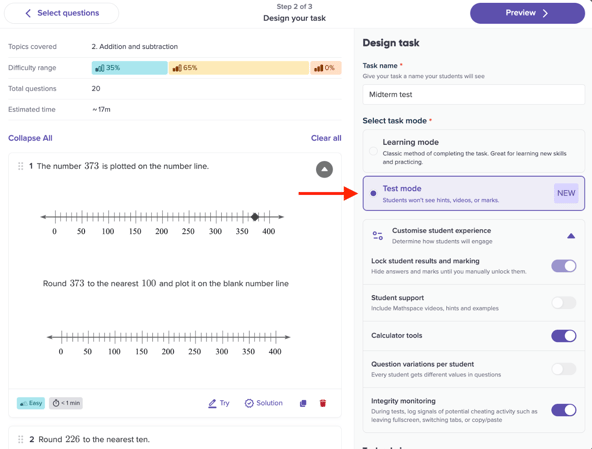
Step 2: Build your test
- Select the questions you’d like to include.
- In the Design step, turn on Test Mode.
- Set the test duration.
Step 3: Schedule and assign
Set the test start time, then assign the test to your students. You can also convert any task template into a test by assigning it in ‘test mode’.
Student Experience
Before the test start time
Students will see the test card on their dashboard, but they won’t be able to begin the test until the start time.
Once the test start time begins
Students can start the test. Key aspects of the experience include:
- No in-question feedback while answering, and Milo will not be available.
- Students can move freely between questions.
- A timer shows progress against the test duration.
- A review screen appears before submission so students can check and edit answers if needed. The review button is always accessible during the test at the top right of the workbook page.
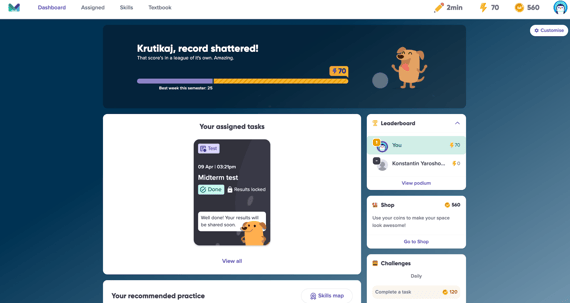
After the test
Students won’t be able to view results until you unlock them.
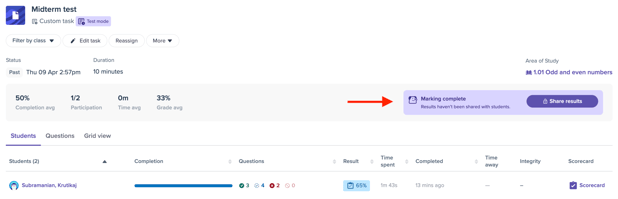
Test results
Marking and results timing
In Test Mode, student responses are initially graded by our Math engine and an AI-assisted marking step.
Results are typically available about 10 minutes after all students have submitted the test or the test duration has ended.
When results are ready, you’ll be able to review the marks, override any scores as needed, and add notes to explain overrides. After that, you can choose to unlock results so students can view them too.
If Test Mode is still not available for your school, please contact support@mathspace.co or use the chat button to request assistance from our support team to enable it.