
Give different groups of students their own due dates, and see everyone's results in one task report.
Task groups let you assign one task to several groups of students, each with its own dates. A group can be a whole class, a few students from a class, or a mix of both.
Because it's still one task, every group's results land in the same task report. There's no need to assign the task several times and piece the reports together yourself.
Use task groups to:
- set different due dates for different classes doing the same task
- give some students extra time without creating a second task
- see results across all your classes in one place, then drill into each group
What you can set for each group
Each task group has its own:
- Students: whole classes, selected students, or both
- Start date / Due date
- Extension days: the number of days students can keep working after the due date
- Calculator tools: on or off
Everything else is shared by every group: the questions, the task mode, and the other student experience settings (Student support, Question retries and Question variations per student).
Assign a task to multiple groups
1. Go to the Preview step
Create your task as usual, then continue to the last step, Preview (Step 3 of 3).
2. Add a task group
Under Assign task, click + Task group. Anyone you've already chosen becomes Task group 1, and Task group 2 appears below it, ready for students.
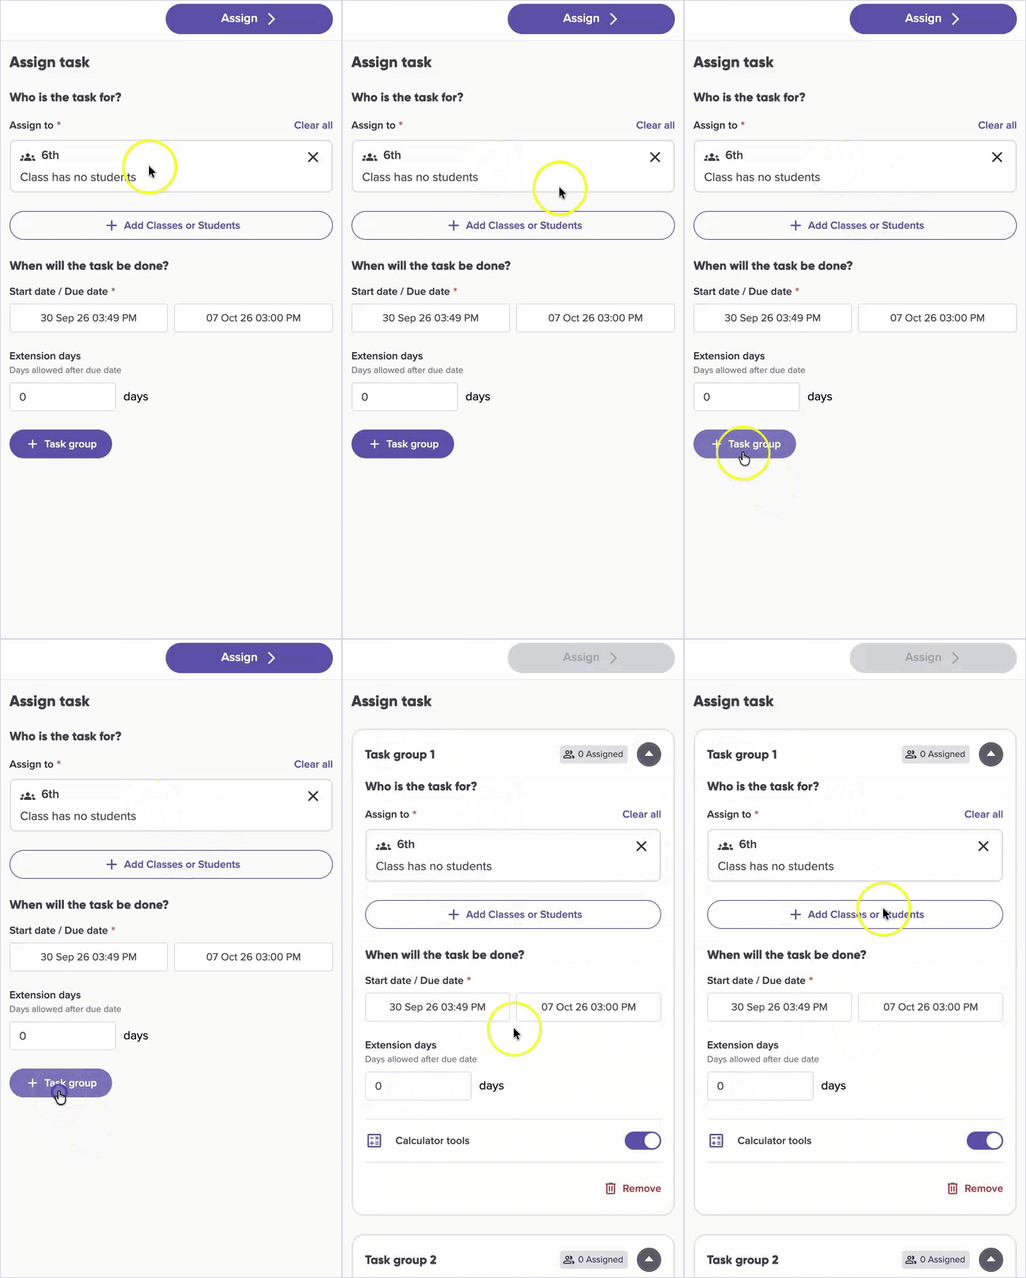
3. Choose the students for each group
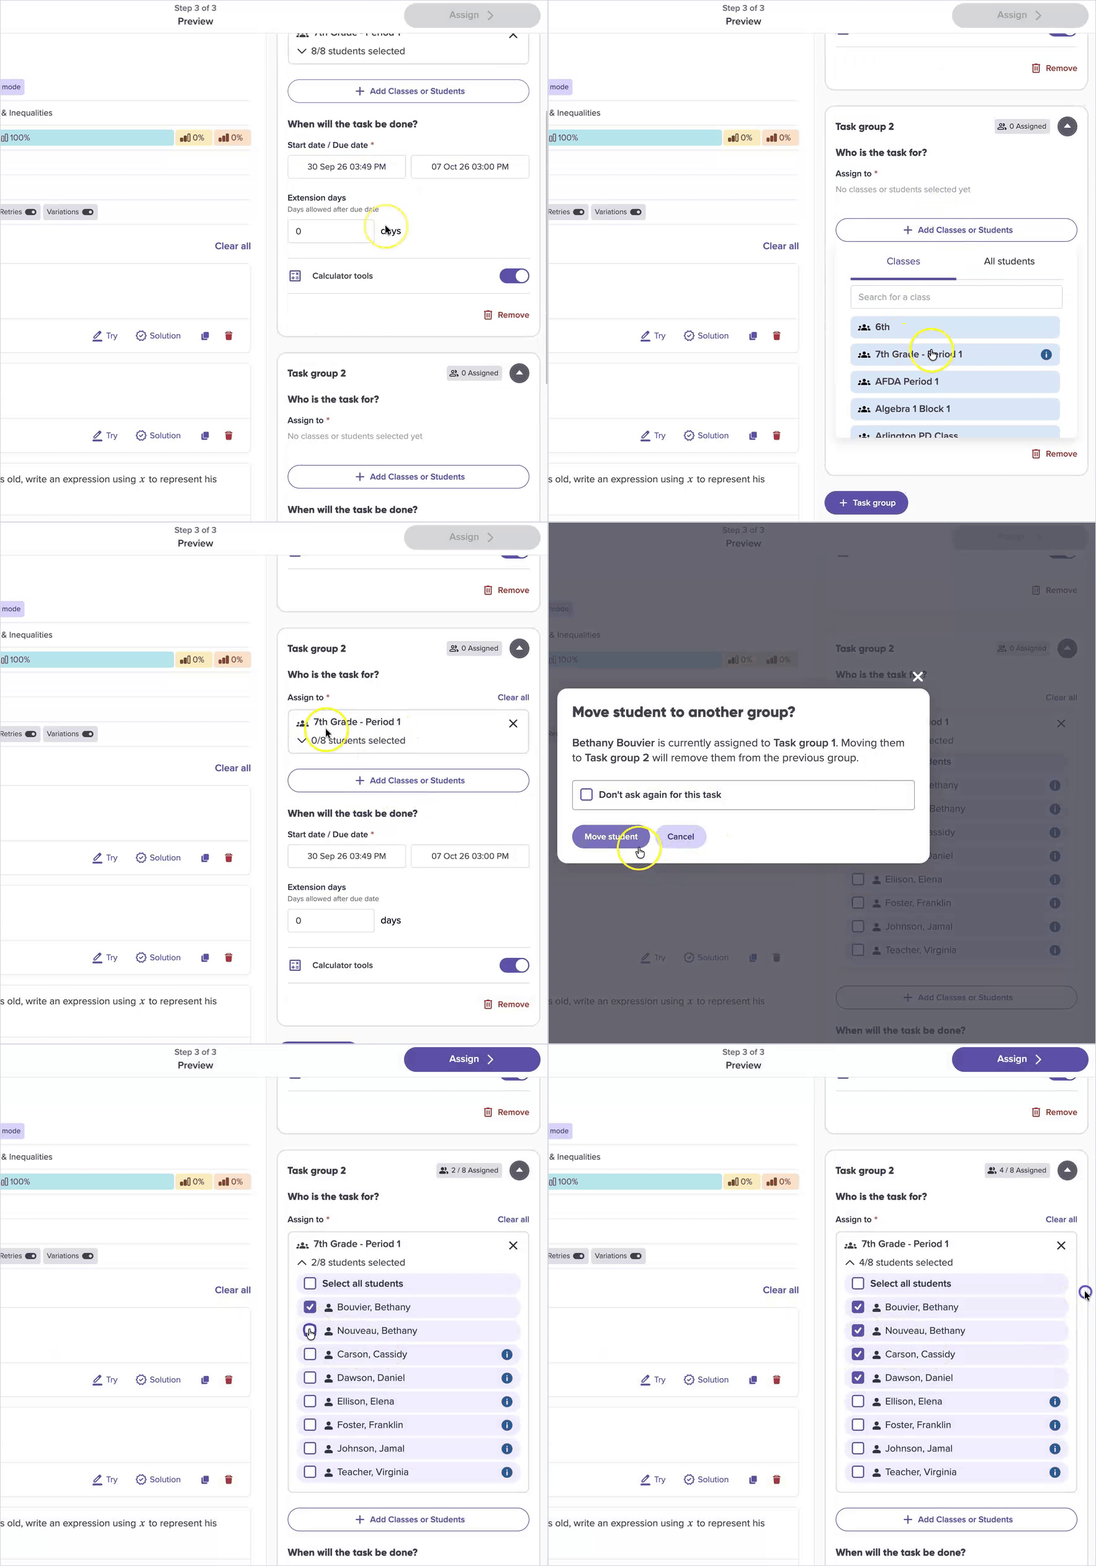
In each group, click Add Classes or Students, then:
- use the Classes tab to add a whole class, or
- use the All students tab to add individual students.
When you add a class, all of its students are selected, except any who are already in another group. To change who's included, click the count under the class name (for example, 8/8 students selected) to open the list, then tick or untick students.
To move a student who's already in another group, tick their name and click Move student to confirm. They'll be taken out of their old group. If you're moving several students, tick Don't ask again for this task to skip this message.
4. Set each group's dates
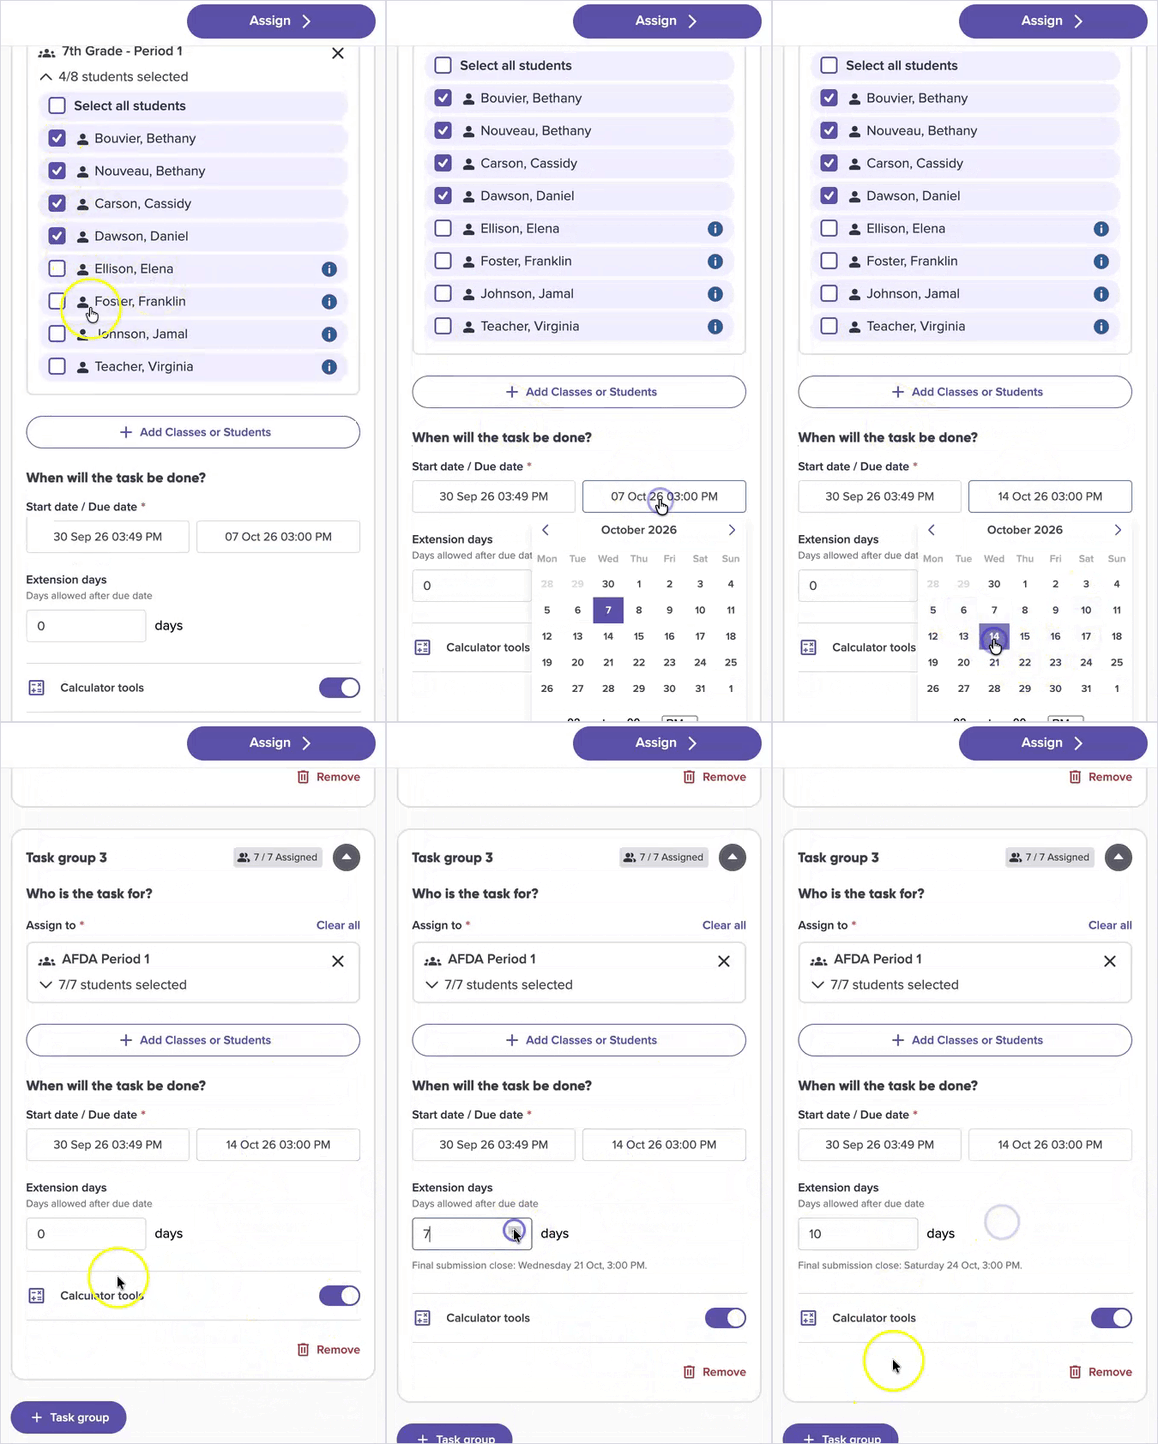
Under When will the task be done?, set the Start date / Due date and Extension days for each group. A new group starts with the same dates as the group above it, so check each one. When a group has extension days, you'll see its final submission close date underneath.
Each group also has its own Calculator tools setting, so you can turn calculators on for one group and off for another.
5. Assign the task
Add more groups with + Task group, or delete one with Remove. When your groups are ready, click Assign. If you can't click Assign, check that every group has students selected.
See every group's results in one report
All of your groups share one task, so there's one report to check.
In the Tasks tab
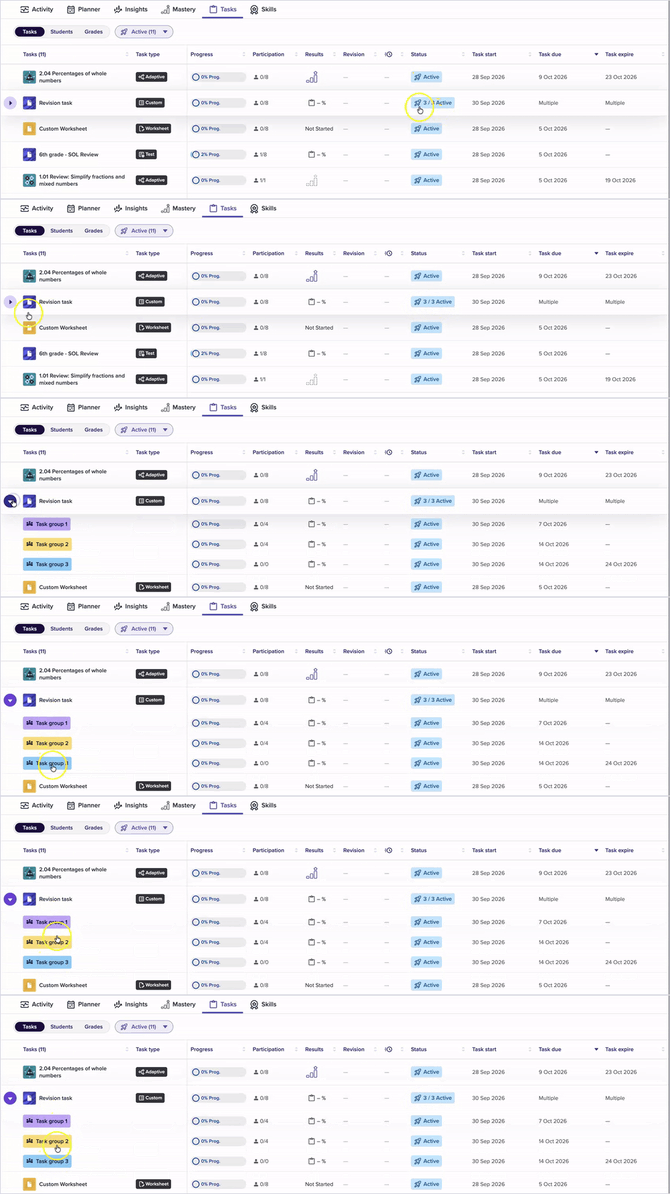
In your class's Tasks tab, a task whose groups have different dates shows Multiple under Task due and Task expire. Click the arrow next to the task name to see each group's dates and progress. The Tasks tab only counts students in that class; the task report shows everyone.
In the task report
Click the task name to open its task report. Show all lists every student in every group, even if they're in different classes. The Task group column shows which group each student is in, next to their own start, due and expiry dates.
To look at one group on its own, click it above the summary (for example, Task group 2). The summary and student list update to show just that group and its dates. Click Show all to see everyone again. You can also use Filter by class and Filter by task group at the top of the report.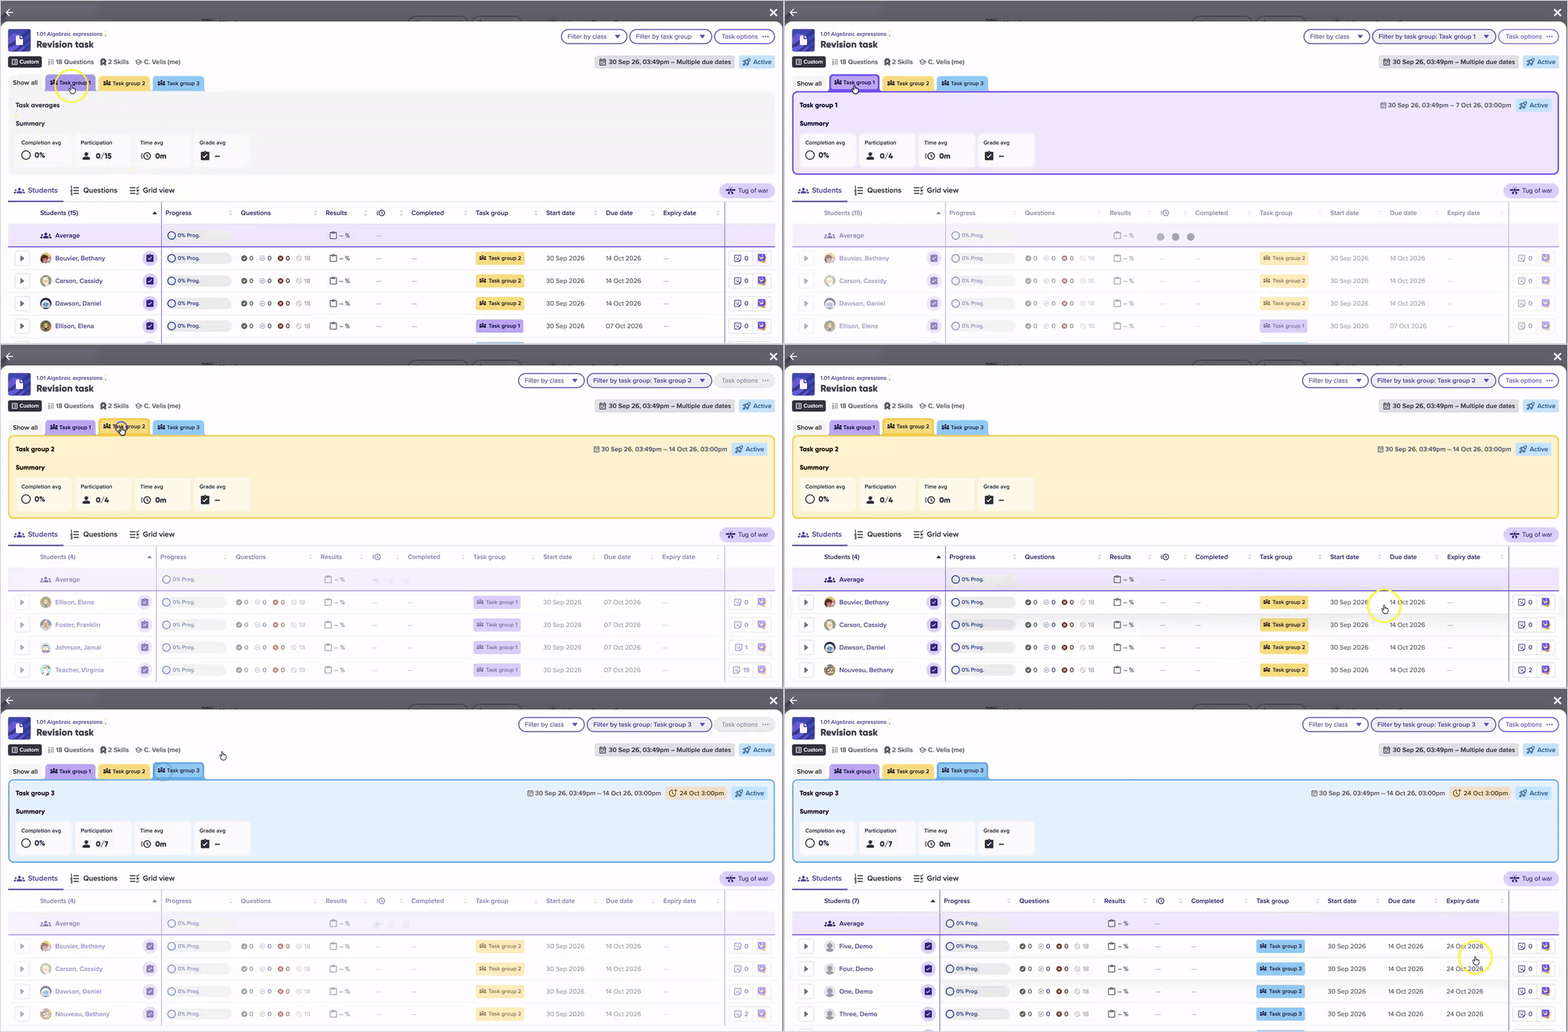
Edit task groups
You can change your groups after the task has been assigned, for example to give one group more time.
1. Open the editor
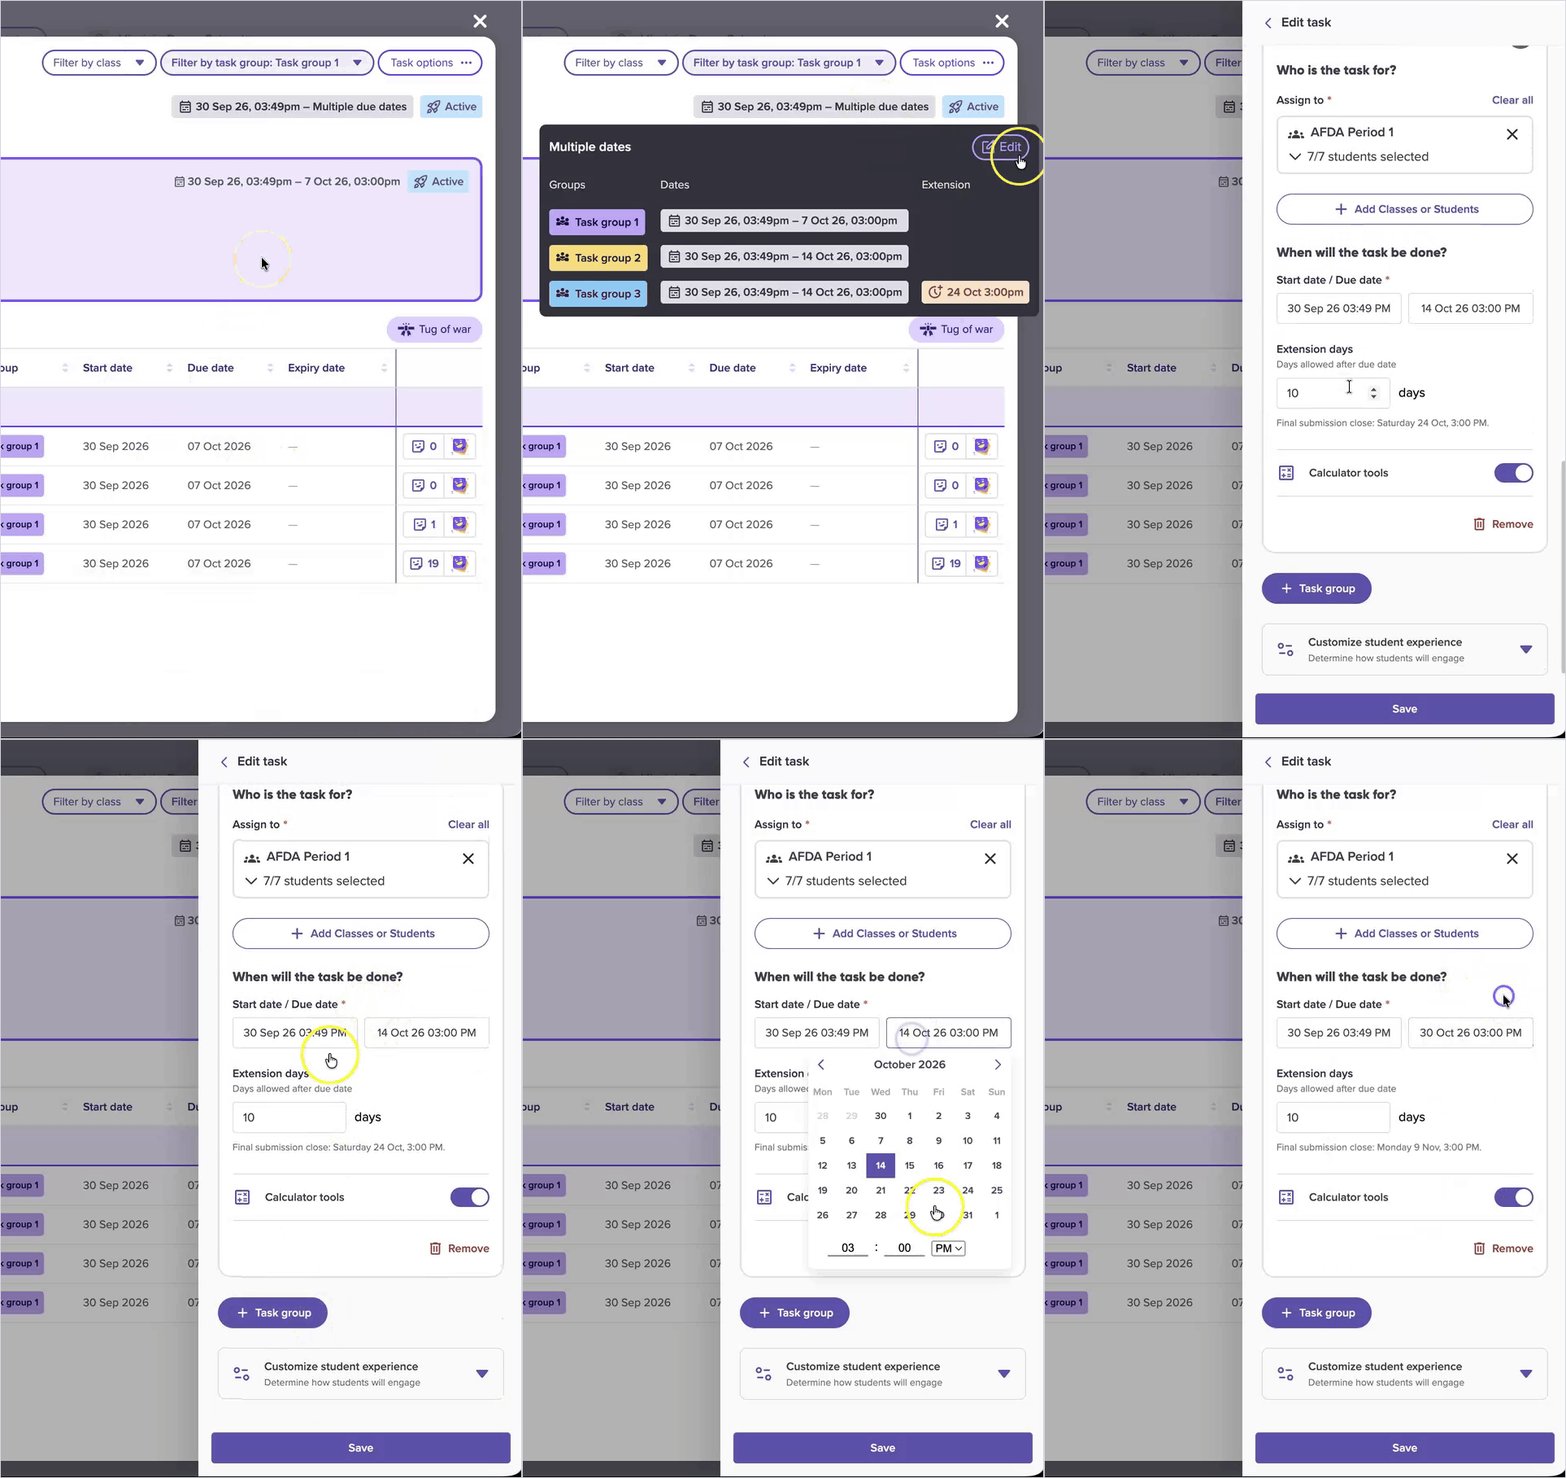
In the task report, hover over the dates at the top right. When your groups have different due dates, these show Multiple due dates. A summary of each group's dates and extensions appears. Click Edit.
You'll also find an Edit button when you hover over a group's label in the Task group column.
2. Make your changes
The Edit task panel lists every group. You can:
- change who's in a group, the same way as when you assigned it
- change a group's Start date / Due date, Extension days or Calculator tools
- add a group with + Task group
- delete a group with Remove
- rename the task, or change the Customize student experience settings, which apply to every group
3. Save
Click Save. You'll see Task edited successfully, and the report updates straight away, including any new groups.
Good to know
- Each student can only be in one group per task. Adding a class won't include students who are already in another group; tick them and click Move student to bring them across.
- Groups are numbered automatically: Task group 1, Task group 2, and so on.
Related articles